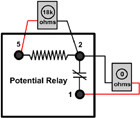
Potential Relay Troubleshooting
Operating And Troubleshooting Potential Or Voltage Relays 2018 03 05 Achrnews

Know Your Potential Starting Relays

Troubleshooting The Hvac Potential Relay Youtube
Ice Breaker Troubleshooting Potential Relays

10 3 Potential Relays 10 4 Solid State Starting Relays And Devices 10 5 Motor Bearings 10 6 Motor Drives Components For Electric Motors

Refrigerator Potential Relay Refrigerator Troubleshooting Diagram

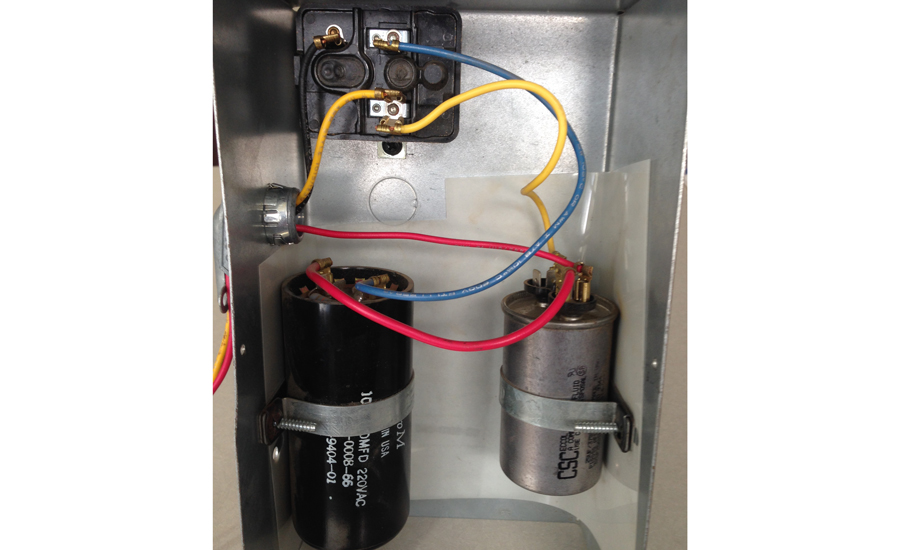
Whenever possible the model number on the old relay should be used when ordering a new relay.
Potential relay troubleshooting.

Ice Breaker Troubleshooting Current Relays 2012 09 03 Achrnews

Potential Type Relay Hvac Troubleshooting

Hvac Motor Start Relays Hvac Troubleshooting

Potential Relays What Happened To Terminal 3 Hvac Training Solutions
Source : pinterest.com
